


This thread is for pics and comments focusing on the transformation of MP Ironhide and Ratchet. Comments about other aspects of these toys should be directed to their relevant toy review threads.
※ Masterpiece Ironhide Review thread
※ Masterpiece Ratchet Review thread - link to be added later
-------------------------------------------------------------------------------
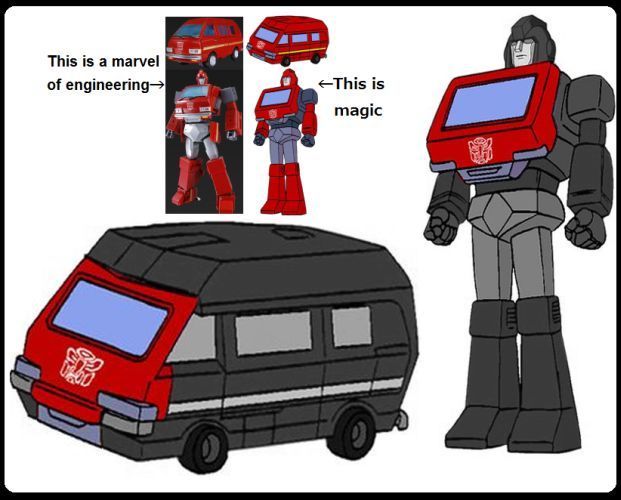
We all know the story. The G1 Ironhide and Ratchet toys have about 70% of their vehicles transforming into detachable mobile decks, meaning that the core robot is predominantly comprised of the front portion of the vehicle. The G1 cartoon design took this to a greater extreme by having the mobile deck simply not exist (except for Ratchet's deck which appeared for la few seconds in only one episode). So basically, most of the vehicle mode just magically vanished when transforming to robot mode. We know that this cannot be done in real life, meaning that TakaraTOMY had 3 options:
1. Give them detachable decks.
2. Have them carry a good chunk of their alt mode parts on their bodies as shellformers.
3. Incorporate all of the vehicle parts into the robot mode while attempting to minimise shellforming.
TakaraTOMY went with the hardest option, #3. And IMO they've managed to pull off a spectacular job in creating a toy that manages to incorporate all the vehicle mode and does pretty well in concealing most vehicle parts. The most glaring shellforming are the front doors on the hips, but when you consider that they had to jam-pack the rest of the vehicle into the robot, I think that it's an easily acceptable compromise. We've seen HasTak do this before with Classicsverse Ironhide/Ratchet, which are still really good toys considering that they are smaller and cheaper Deluxe Class figures, but with a Masterpiece budget and much bigger size (Ironhide towers over all other MP Cars), they're clearly able to do a more impressive job.
Convert to robot mode!
Begin conversion.
Detach connection points and lift rear canopy section.
Lift side panels.
Swing arms out. Connect tabs.
Lift side sections all the way up.
Lower rear section down towards the front.
Extend rear section.
Swing down rear section.
Tuck rear section in.
Swing rear wheels out.
Swing rear wheels in and push into recesses as shown.
Swing down rear side panels.
Swing rear side panels inwards to conceal recessed wheels.
Swing down mid side panels.
Swing mid side panels down until they sit flush.
Tip: I use my thumb to gently push the locking tab upwards to give the panels enough clearance to swing in.
Disconnect tab and slot to separate the legs.
Pull lower legs down at the knees to extend them.
Rotate lower legs 180 degrees.
Rotate toes outwards 180 degrees.
Fold up rear bumper sections to form heels.
Pull door panels outwards.
Lower legs 90 degrees.
Rotate door panels back 90 degrees.
Push door panels in.
Fold front wheels inwards and insert tabs into slots.
Raise stomach section.
Fold front windscreen section out.
Lift front windscreen section up. Be careful not to snag the stomach section.
Clip front windscreen section in to form chest.
Lift arms up 90 degrees.
Rotate arms out to the sides to lower them.
Open forearm panels.
Extend forearms at the elbow joints.
Close the small outer arm panels.
Rotate fists out.
Close forearm panels as shown.
Attach clips to shoulder catches.
Conversion to robot mode is complete!
Reverse the order of instructions to convert back to vehicle mode.


 Reply With Quote


