


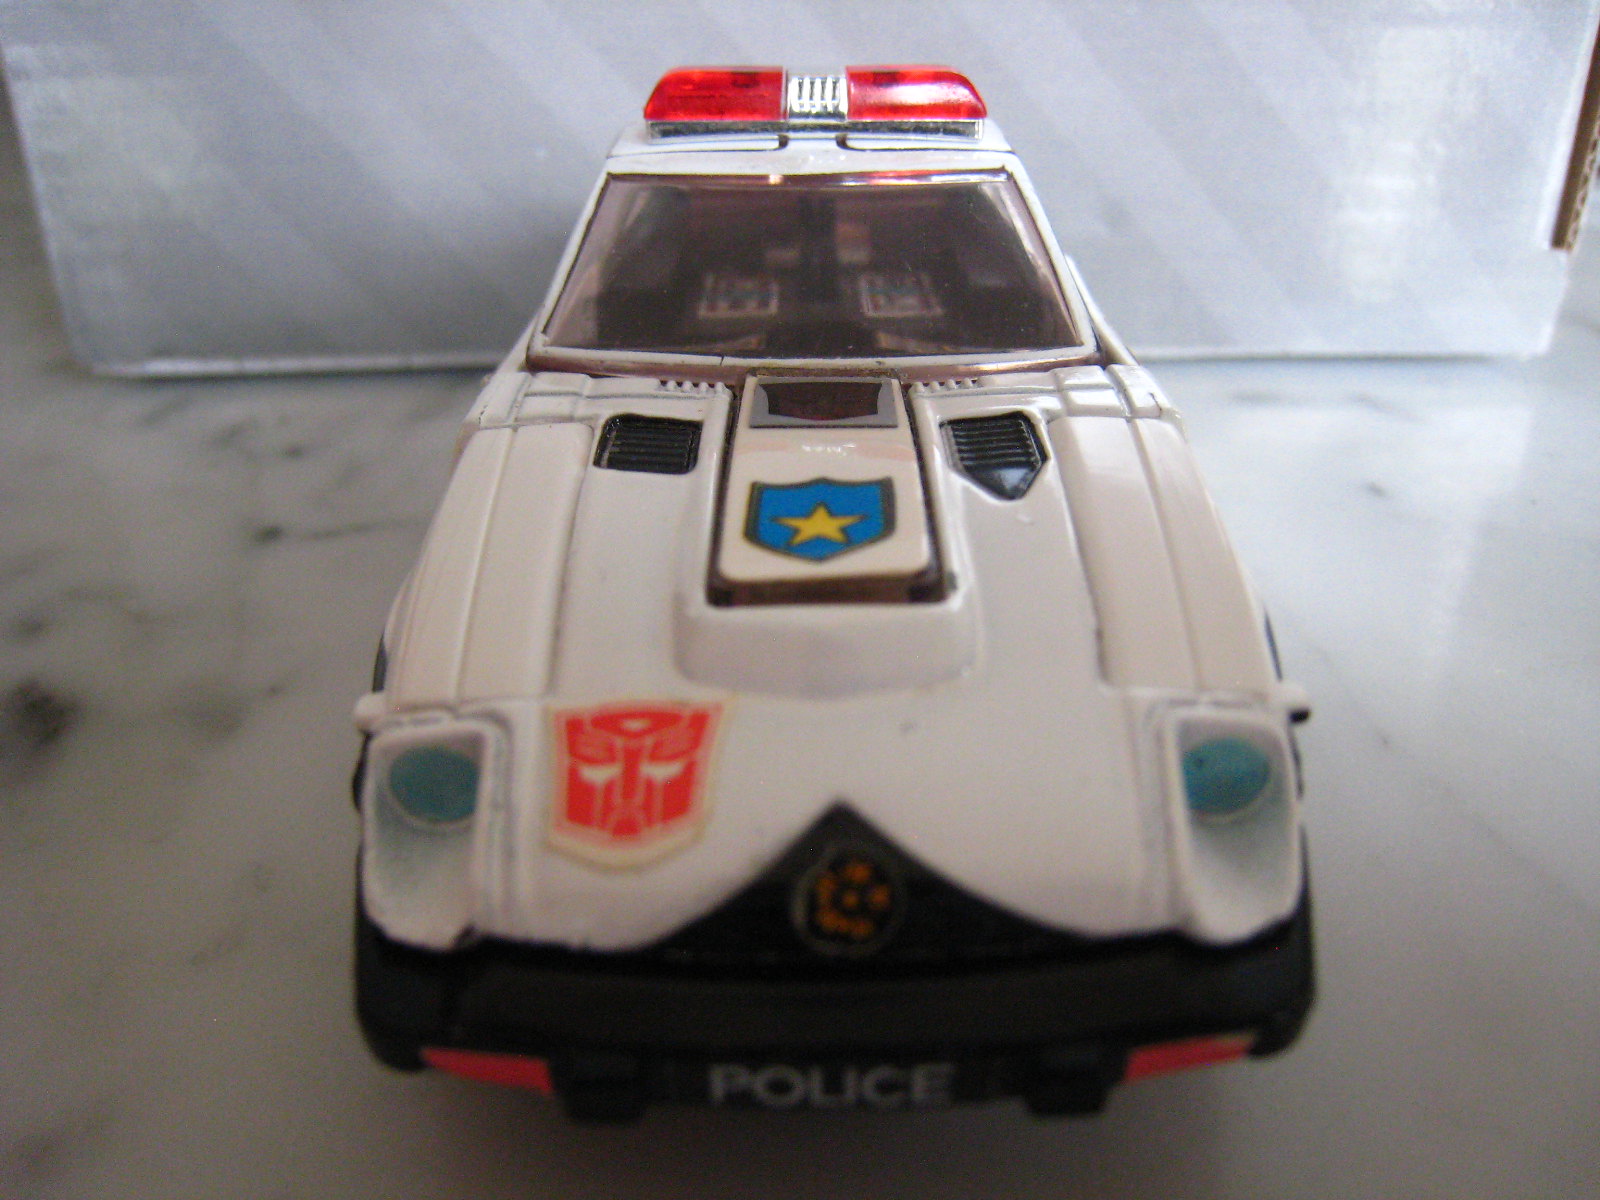
As with many other G1 Prowls (and Smokescreens and Bluestreaks), the windscreen of mine broke at the bonnet in childhood. I glued it many times with superglue and other glue but it would break again. So I decided to pin it. I hope my experience might be of use to others attempting repairs.
Equipment - hand drill and bits, pin, pliers and wire cutter to cut pin. I used a hand drill and micro bit (0.55mm) obtained from Jaycar but they can be bought from elsewhere like ebay. I found some random pin in my hardware box. Make sure the drill bit is slightly smaller than the pin diameter so friction holds things together. Micro screws could be an alternative.
Method - nothing really special, just a lot of care lining up the broken pieces and imagining how the pins would run, and slow hand drilling with repositioning of the bit if the placement looked wrong (in 3D). The plastic is easy to drill slowly by hand but it may depend on how good your bit is. I couldn't remove the hardened glue and sanding it down may have altered how the broken ends fitted. Fortunately my ends contacted well in a jagged way, so alignment of ends (and the windscreen relative to the car) was ok.
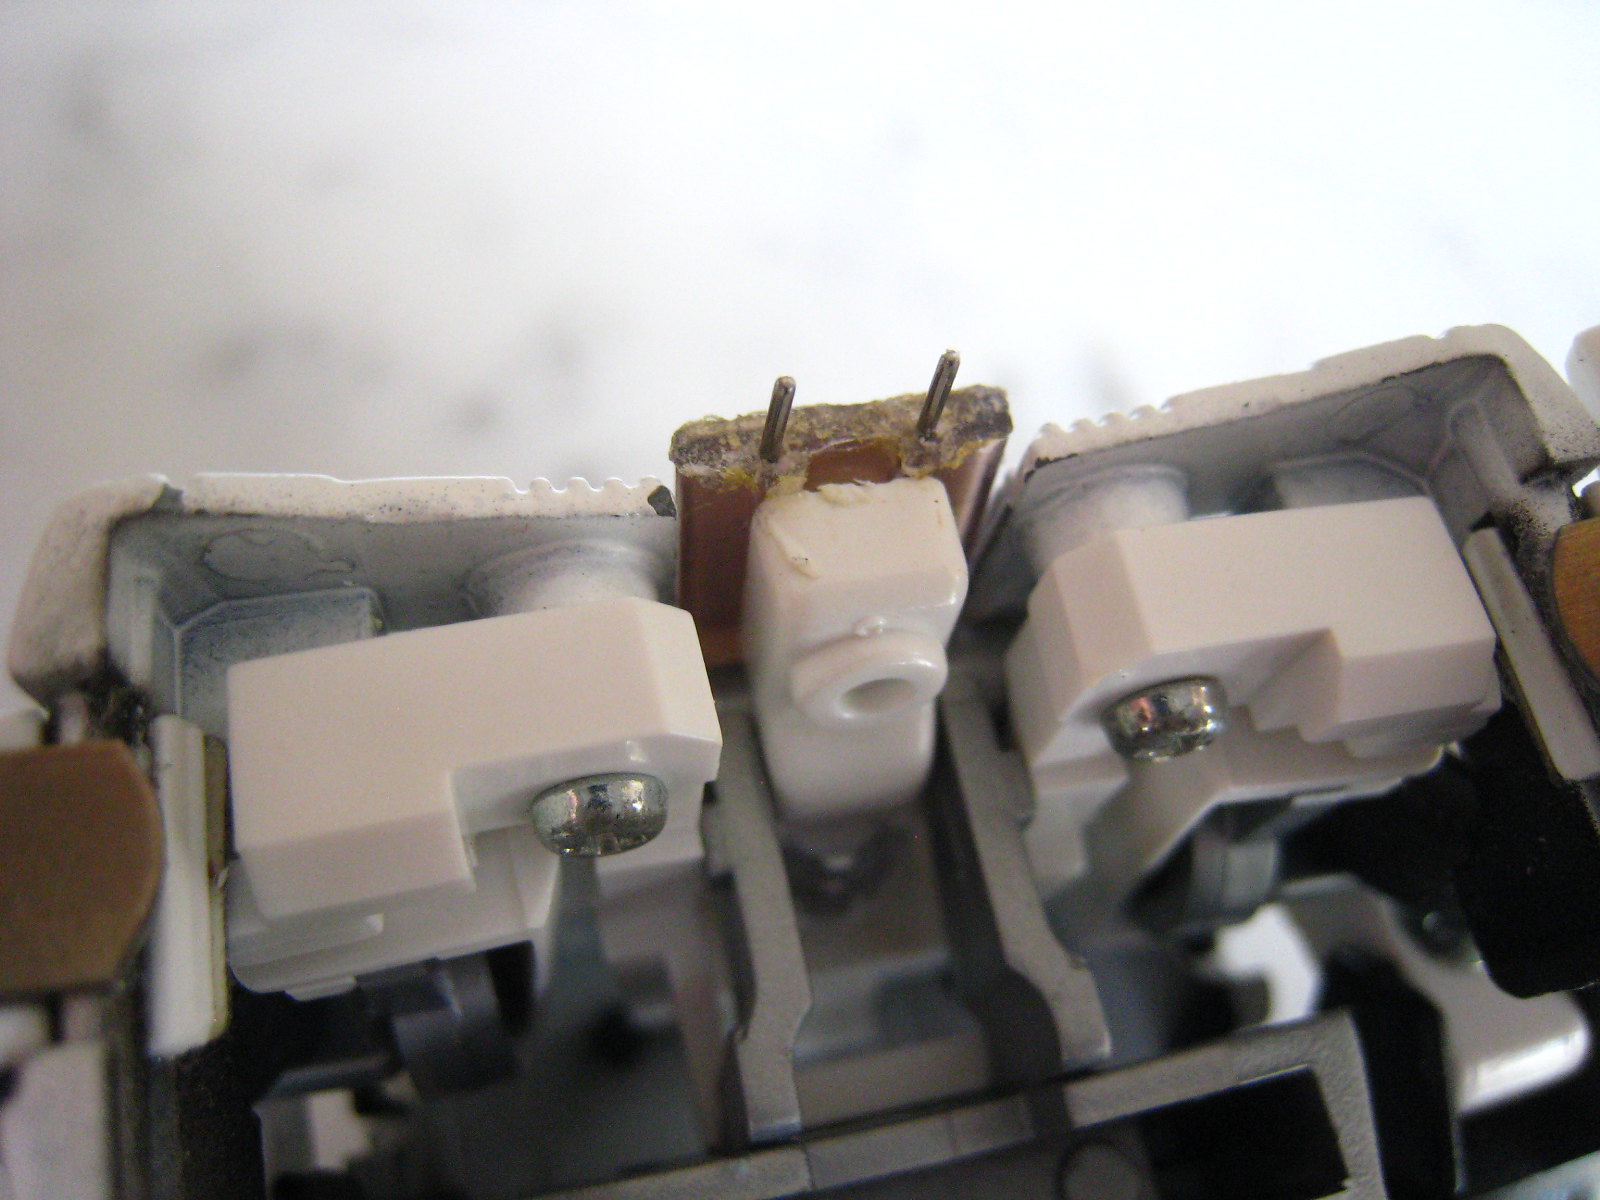
1. I used 2 pins to prevent rotation of the windscreen around just 1 pin, to add strength, and to reduce stress of plastic around just 1 pin.
2. Planning - I aligned the windscreen with the bonnet and imagined how and where the pins (drill) would enter the broken surfaces.
3. On the bonnet part, there are 2 ridges of plastic underneath that allow for more plastic around the pins, so I put my bit in the centres of these areas. I drilled 3-4mm deep trying to keep the bit horizontal. There is a slight curve of the bonnet so drilling too deep may penetrate the top of the bonnet. I drilled 1 side first then lined up the windscreen and drilled the windscreen rather than doing 2 holes in the bonnet first, thinking it might make alignment better.
4. I put the upside down windscreen on top of the bonnet to align the horizontal position of the windscreen hole.
5. My windscreen had broken such that it forms a right angle surface, so I drilled horizontally (perpendicular) into that. On the inside and the bottom of the windscreen, there are small plastic blebs, so I drilled taking these into account as my centre. That is, not the centre of the windscreen main front edge. The vertical position of the bonnet and windscreen holes were really determined by Step 2 and trying to have as much plastic surrounding the pins.
6. After doing the left side, I put the pin in and connected the windscreen and bonnet to check all the alignments, then drilled the right side. I pulled the pin out and cut it in half.
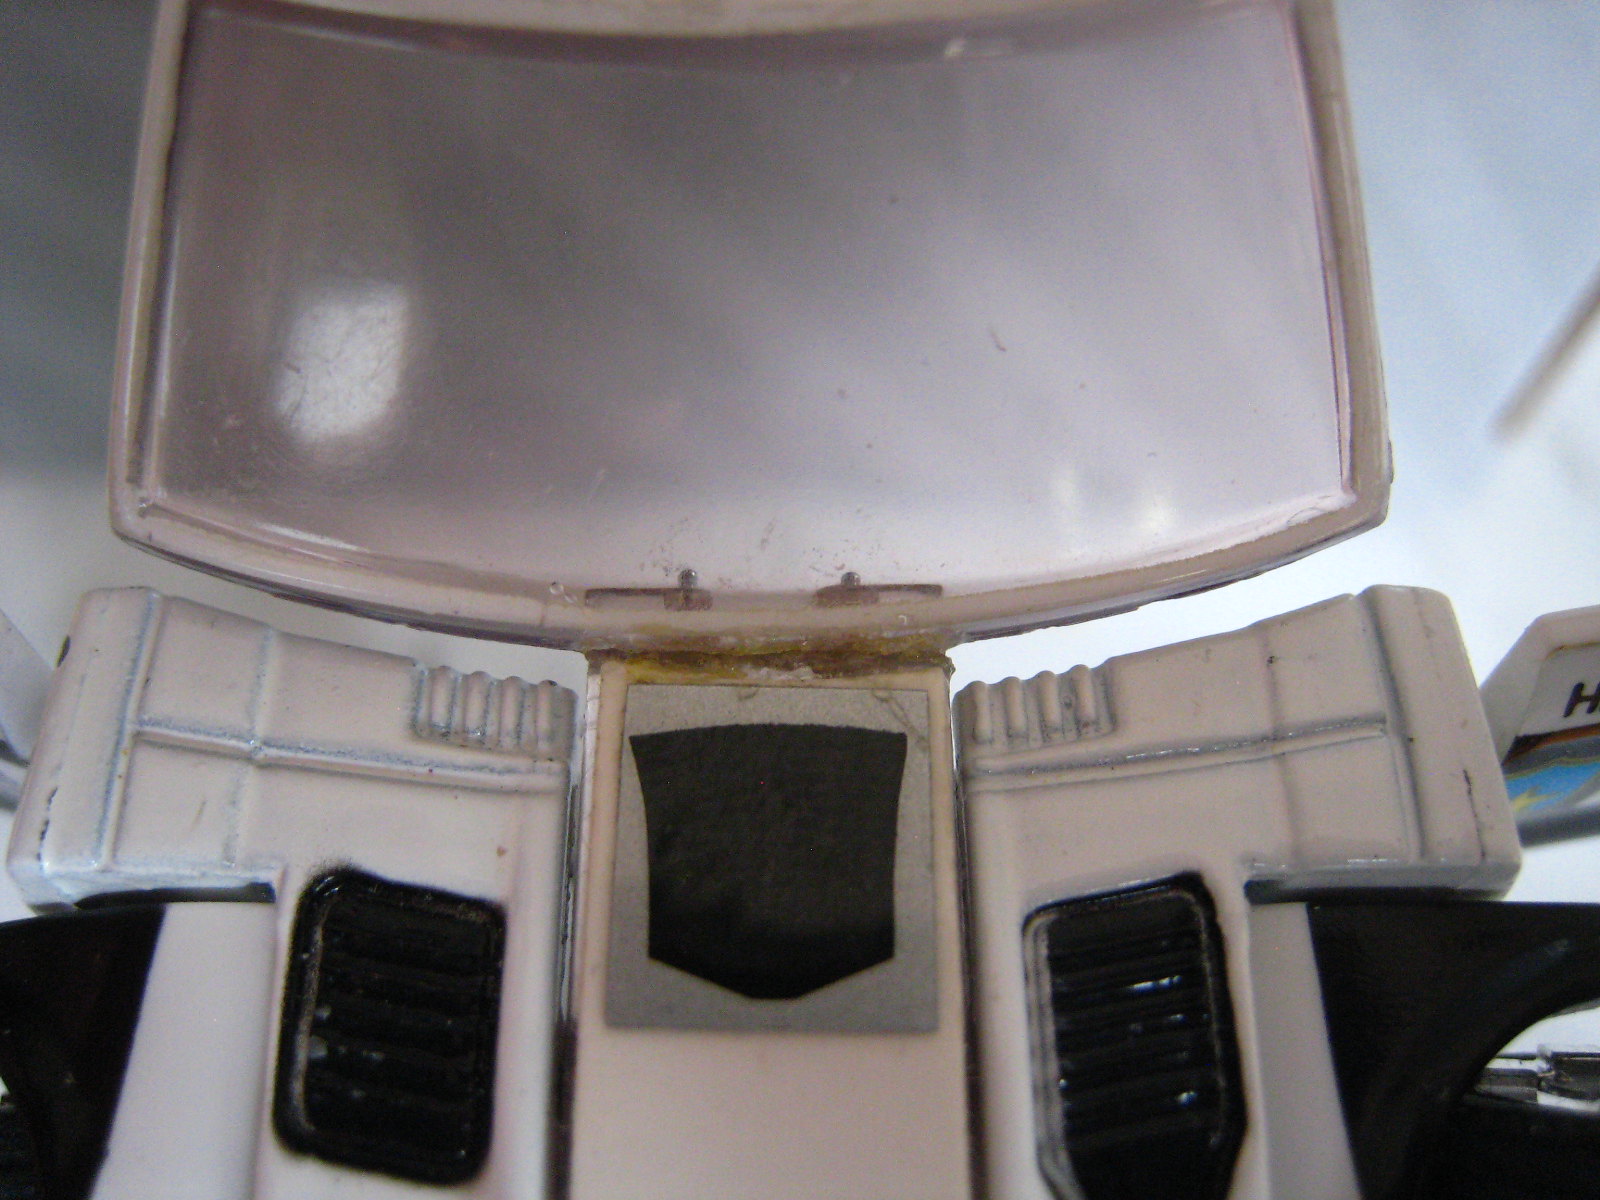
7. Finished repair. It looks solid but there is very slight play around the windscreen holes and I still will be careful with transformation so I don't crack the windscreen around the pins. The roof sits well but there is some upward angulation, which I think reflects the horizontal angle of the windscreen holes (but this is really hard to do perfectly). Luckily the rear hatch windows and their hinges are sturdy enough to hold the roof down and without stressing the windscreen holes. There's still a bit of lifting but I often couldn't get it flush when it was glued before anyway. On the front view, the roof sits quite squarely with the bonnet (previous glue attempts sometimes had it tilted slightly). I could trim the pins a bit more but it looks fine in both modes.
FINAL THOUGHTS
- This is such a small area to operate on so there is little room for error.
- Because each hole has to be drilled separately, it can be easy to have them misaligned, especially if you are drilling into a glued surface that's rocky and uneven. I had to reposition and guide the bit against my finger for one hole.
- Once a hole is made, that's it, unless you can fill it again and redrill, but this is a small area that might only take so much drilling before integrity is lost.
- If it doesn't work, and you haven't ruined your figure, at least it could be glued again without noticeable leftover holes.


 Reply With Quote

 . But then why have a hinge just below Prowl's head/a movable roof at all?

