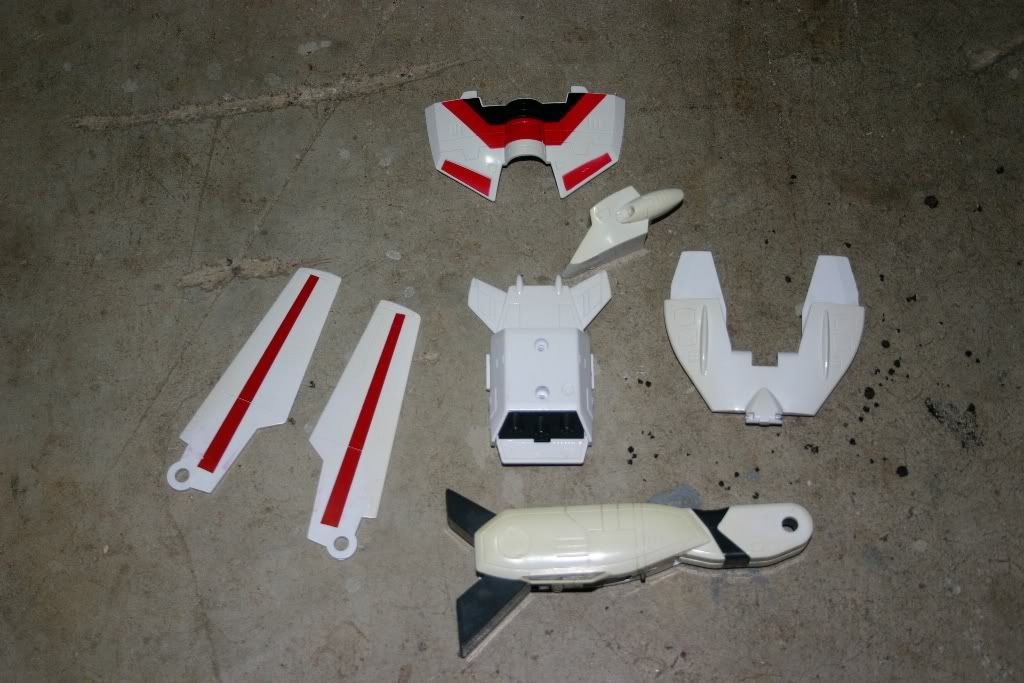
Page 2 of 2 FirstFirst 12
Results 11 to 20 of 20

Thread: bringing Jetfire back to life

  1. #11
    Join Date
    29th Dec 2007
    Location
    BrisbaTron
    Posts
    238

    Default

    Whee 'Transformer Science' time Nice results Damned! Hope those parts that are still a little yellow can improve further

    Quote Originally Posted by Eruntalon View Post
    But as others have suggested, only time will tell if the chemical makeup of the plastic has been deteriorated to breaking point.
    Does anyone have a junker and the time to test the integrity of the bleached plastic? It would be interesting to know

  2. #12
    Join Date
    30th Dec 2007
    Location
    Batemans Bay
    Posts
    2,304

    Default

    Quote Originally Posted by sifun View Post
    does it smell bad
    havent tried to smell it

  3. #13
    TheDirtyDigger Guest

    Default

    Man I gotta dig through my collection just to find something yellow to try this on.

  4. #14
    Join Date
    30th Dec 2007
    Location
    Batemans Bay
    Posts
    2,304

    Default

    here is todays pic

    the leg bits are for comparison's

  5. #15
    Join Date
    28th Dec 2007
    Location
    Ulladulla
    Posts
    5,294

    Default

    Quote Originally Posted by sifun View Post
    does it smell bad
    Not as bad as some of the smells in his house

    Seriously though good work dude.
    HATRED FOR JAMES VAN DER BEEK RISING!

    Still have some stuff for sale. Free pickup at Parra Fair
    http://www.otca.com.au/boards/showthread.php?t=8503

  6. #16
    Join Date
    30th Dec 2007
    Location
    Batemans Bay
    Posts
    2,304

    Default

    would annyone know where these parts go in jetfire?cant remember where they go.


  7. #17
    Join Date
    29th Dec 2007
    Location
    NSW
    Posts
    14,762

    Default

    I did some exploratory surgery to find out where that piece is located, I suspected one of the legs joints so I started it there and found it:


    The spring pushes the tip of that round tab into a hole on the side of the cockpit lower body so that the hip is kept in place in robot mode.

    I hope this helps

  8. #18
    Join Date
    30th Dec 2007
    Location
    Batemans Bay
    Posts
    2,304

    Default

    Quote Originally Posted by kup View Post
    I did some exploratory surgery to find out where that piece is located, I suspected one of the legs joints so I started it there and found it:

    The spring pushes the tip of that round tab into a hole on the side of the cockpit lower body so that the hip is kept in place in robot mode.

    I hope this helps
    thanks kup for the life of me i couldnt remember where it went

  9. #19
    Join Date
    2nd Jan 2008
    Location
    Quakers Hill
    Posts
    11,185

    Default

    Its good you didn't loose it though. Otherwise you'd end up with a hip swivelly Skyfire then
    Wanted AM partner Vanguard, Myclones Dirge, G1 Victory Leo, e-hobby Dark scream ( the black version), e-hobby Magnificus
    Parts- AM partner Basher-side guns, G1 Actionmaster Elite Windmill's blades[I][B]

  10. #20
    Join Date
    29th Dec 2007
    Location
    NSW
    Posts
    14,762

    Default

    Quote Originally Posted by The_Damned View Post
    thanks kup for the life of me i couldnt remember where it went
    Jetfire is a very nice figure to disassemble as everything is within easy reach and you don't need to pull apart most of the figure to remove a limb for example.

    I can tell that the designer (Kwamori, I presume) took into account an 'assembly line' mentality while designing the Macross mold as you can assemble different parts independently and them slowly pull them together unlike modern toys such as Unicron in which you have to pull apart virtually the whole figure to remove one part of it.

Posting Permissions

  • You may not post new threads
  • You may not post replies
  • You may not post attachments
  • You may not edit your posts
  •