Takara has just posted Flash instructions w/embedded video for a bunch of ROTF instructions:
http://www.takaratomy.co.jp/products...03_manual.html
Can someone with a Mixmaster handy tell if the version used in the clip is misassembled or not?


 Rank 9 - Board Staff
Takara has just posted Flash instructions w/embedded video for a bunch of ROTF instructions:
http://www.takaratomy.co.jp/products...03_manual.html
Can someone with a Mixmaster handy tell if the version used in the clip is misassembled or not?
 Rank 1 - New or Inactive
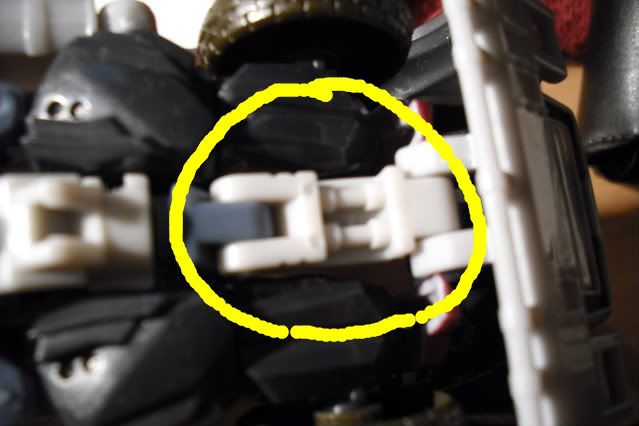
From looking at their video, they are using the version that you guys refer to as the "misassembled" one with the peg that looks like this in alternate mode:Originally Posted by jaydisc

So Taktom are using the same ones that everybody else seems to be finding in their stores but they have modified some of the pictures in the japanese instructions such as "Changing to battle mode" Step 10.
The cab part does fit properly in robot mode provided you flip up that dark grey peg as per "Changing to robot" Step 13.
Just ignore some of the details in the printed english instructions.
However, i still cant get the mode 3 to resemble anything like the instructions nor Kurt's pics (btw, they are really well taken photos Kurt!!).
I might have another go at it later when my cold/flu clears up....
Rank 9 - Board Staff
To me, it looks like the Takara instructions match the toy shipping in Australia:

 Rank 8 - Deluxe Member
After observing the Hasbro instructions and the linked Takara instructions, I've come to a conclusion that the figure is NOT misassembled. Sorry if I lead people otherwise with my earlier pics. Here's why I think it isn't based on what has been discussed so far and from:
Official Hasbro instructions:
To Robot: http://www.postimage.org/Pq2bOSii-8e...918e620663.jpg
Robot to Battle Mode: http://www.postimage.org/aV2b_NeJ-8e...918e620663.jpg
Official Takara Instructions:
http://www.takaratomy.co.jp/products...03_manual.html
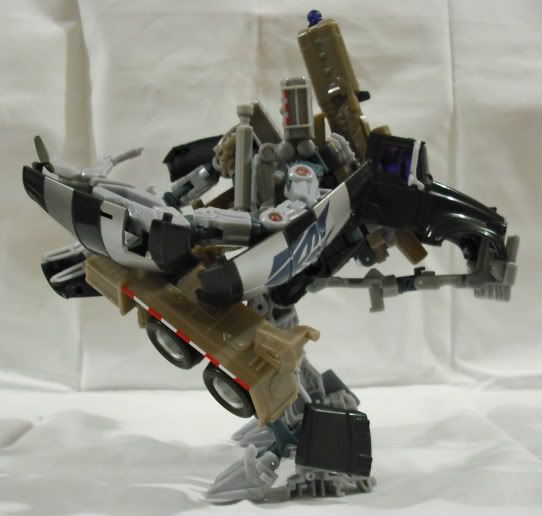
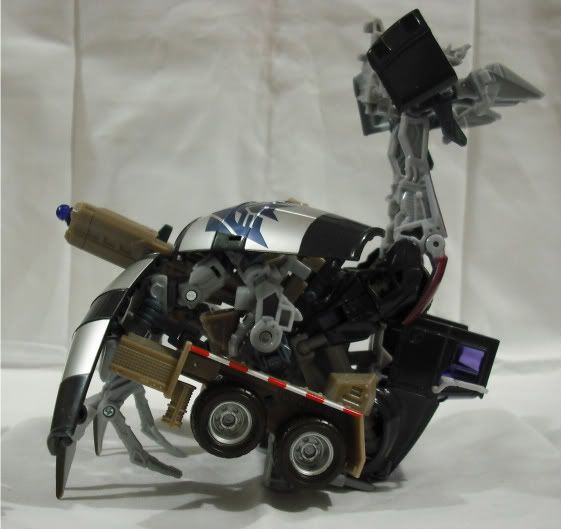
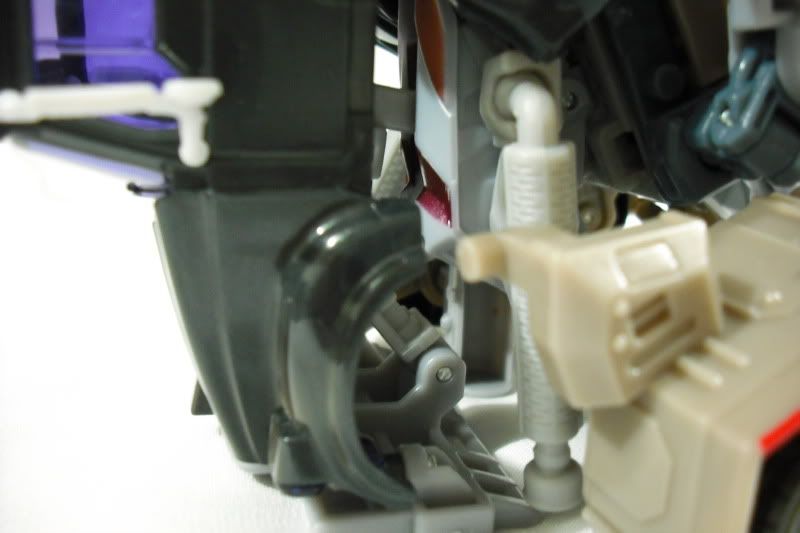
After playing with the toy and converting it into its robot and battle mode using both instructions. I've realized that the Hasbro one is wrong (surprise surprise). If you look carefully at the instructions, the so called" misassembled part is actually an error int he manual. The blue part (with the triangle and knob) hinged to the grey part is the other way around in Hasbro's instructions while Takara's is exactly as the toy is assembled. In Hasbro's instruction into robot mode. Step 13 shows the hinge in question folding towards the back, while it cannot. Looking at Takara's instructions with the video (Step 13) on the link above shows that this is the proper way to align the cab on his back:
Now, I was thinking, surely it's gotta sit on his back better, more flushed, which it might if it was indeed assembled according to Hasbro's instructions but the thing that convinced me is the Battle mode conversion. It was simply designed to have it assembled as we have it already to get into Battle mode. Any other way and it won't be able to convert into battle mode. Do not follow Hasbro's mistransformed instructions. Following Takara's instructions I successfully made the proper Battle mode:
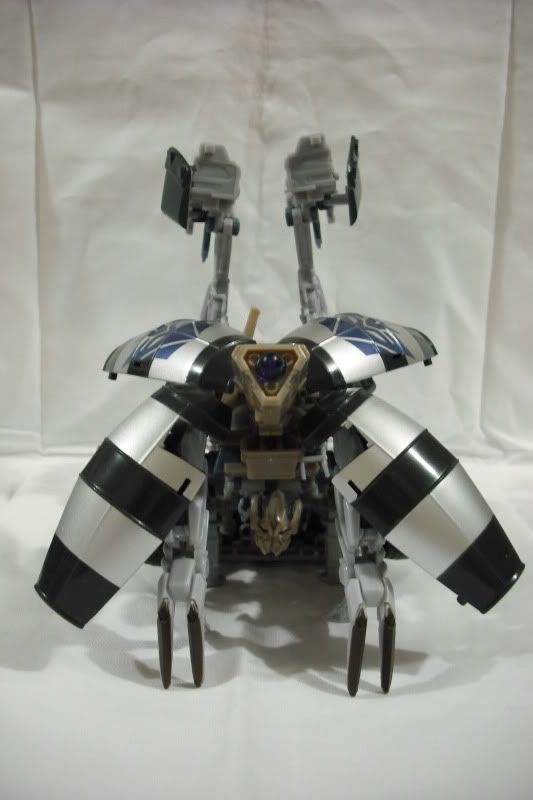
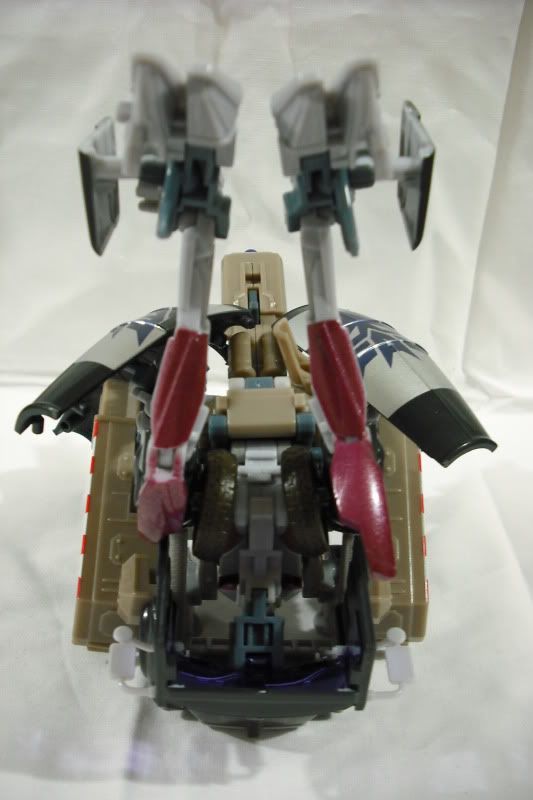
Notice how compact it is. It's quite tricky to position it but follow Takara's instructions and you will get there. The last picture above shows the head ont he underside. Also notice the gas canisters acting as stands? basically the grille of the cab, the gas tanks and his fingers acts as a stand for this mode. See below for a sideview shot with the canister just visible under the wheels:
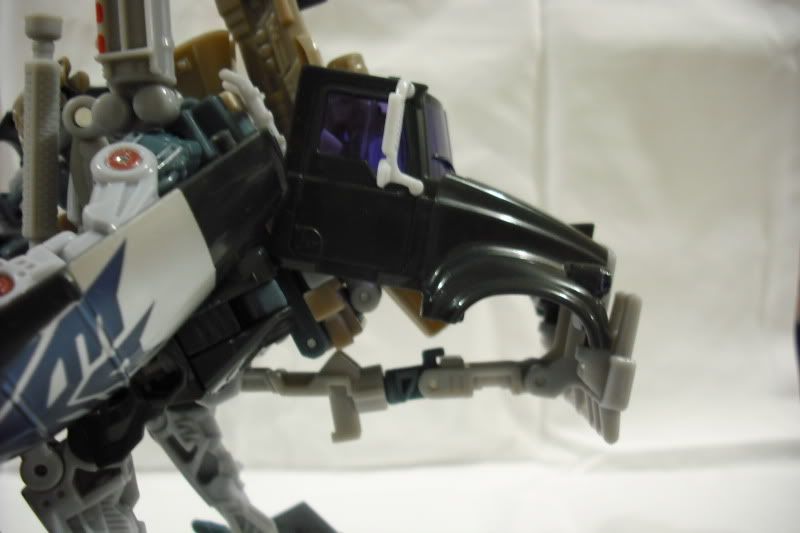
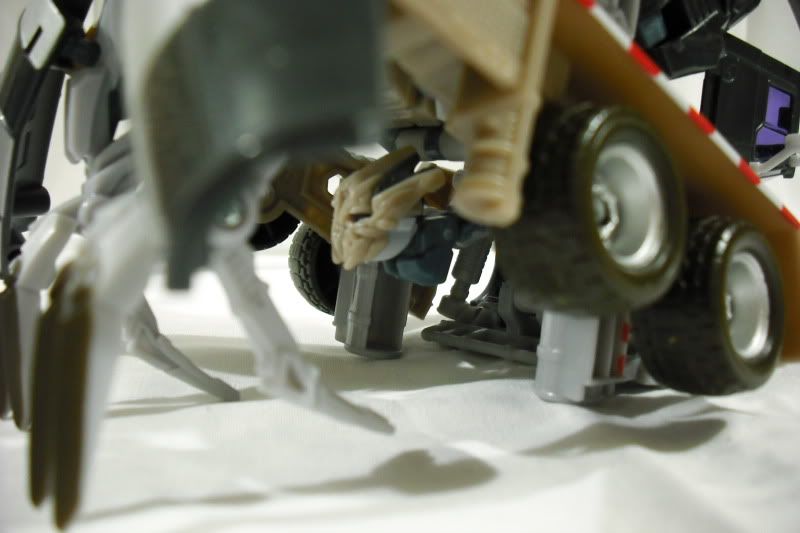
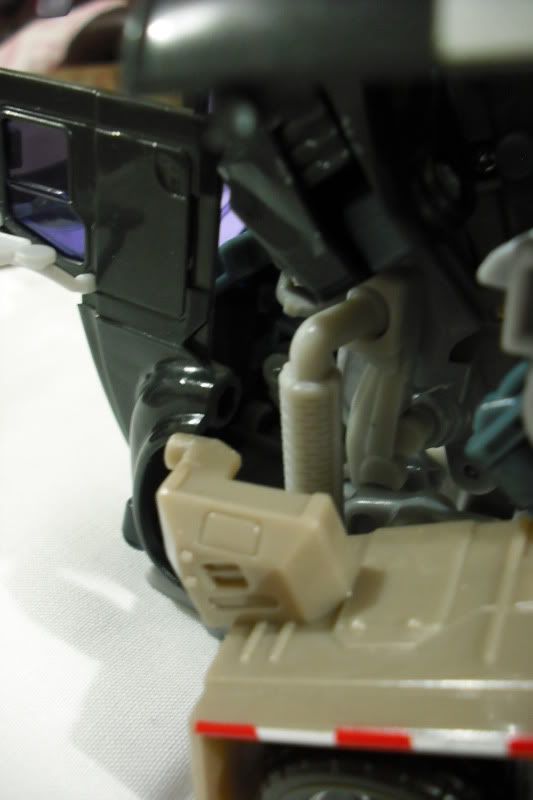
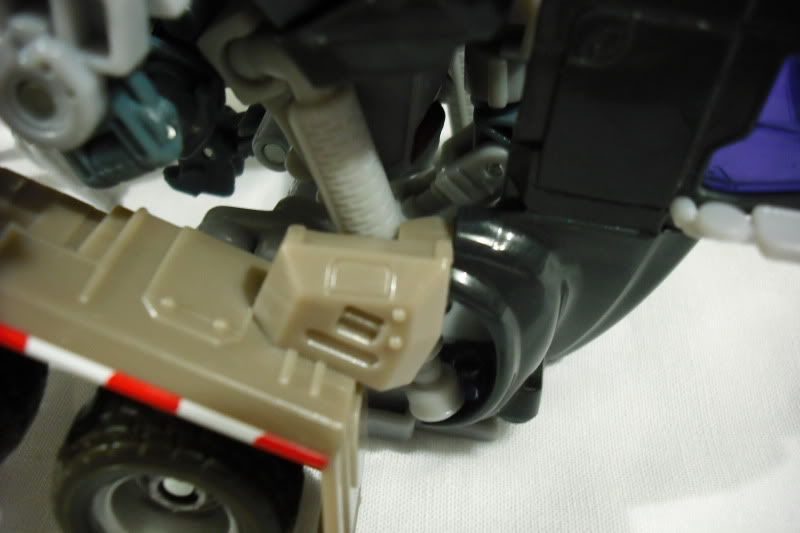
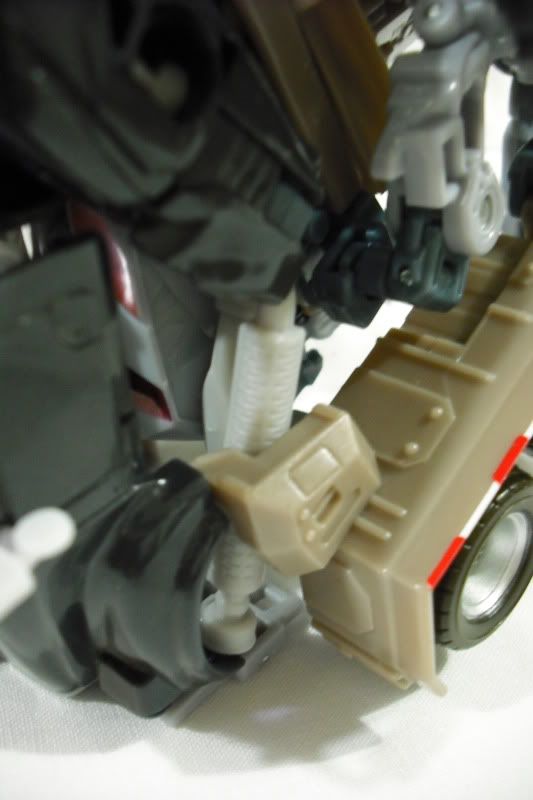
The cab folds into place perfectly as what we have as is from our version. What I noticed too is that everything clips into place nicely. The main thing to know is on Takara's Step 15, you actually peg the tan portion in a hole under the wheel panel/guards. The smoke stacks actually slot into a groove on the inside of said tan part to keep it in place (see pics below).
Below is just how the smokestack slots in. Take note of the top part of the stack resting on the inside of the wheel panel/guard:
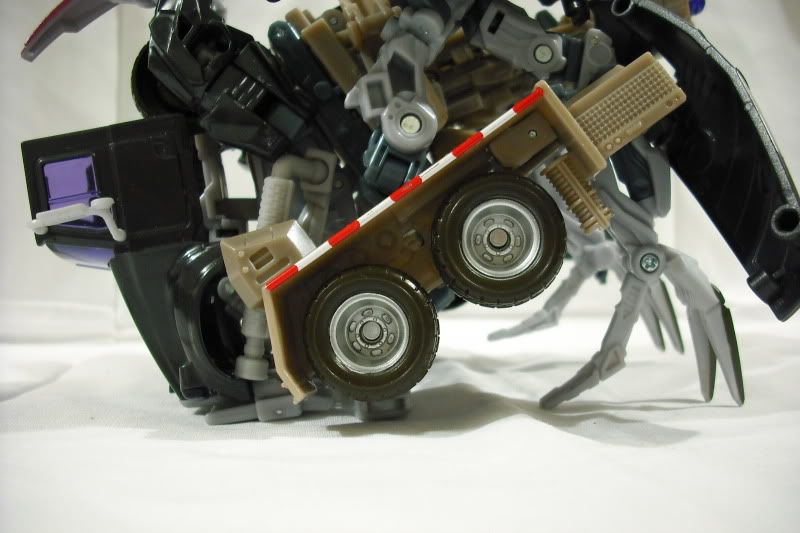
Also you will see below that the peg on the inside of the cab clips on securely in place on that mysterious peg hole on the same strut it's on. This is where the proof that it isn't misassembled. If it was the other way around you cannot make this Battle mode and will be left with the mistransformed monster that is in the Hasbro instructions.
Sorry it was a bit long winded but at least I've cleared this up for myself and hope for you Mixmaster owners too. Sorry for the wrong advice Paulbot and to everyone else. I apologize.
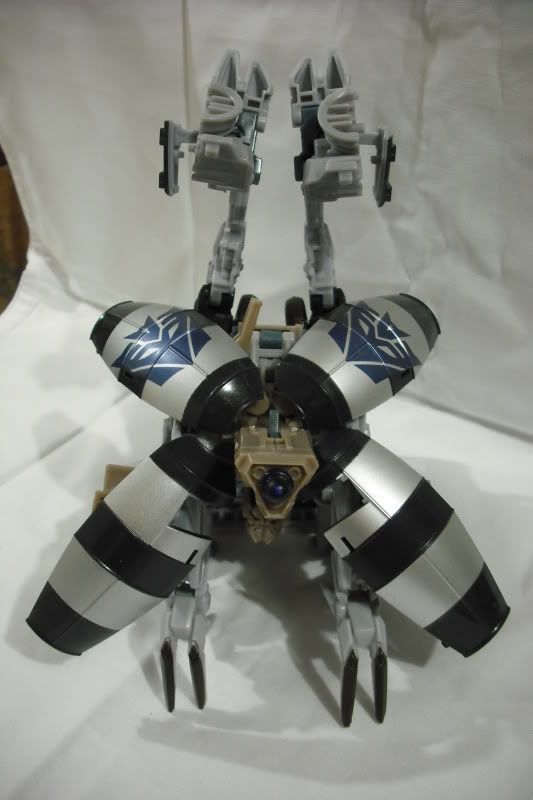
But this propels Mixmaster to greater status on my set of movie figures. I'm digging the Battle mode a lot.
EDIT: Just to note that I slightly altered Battle Mode conversion by making the arms a little higher to get the flower/panel look for the cannon. It's easy to swing the arms down and arrange the panels around to get it to the "official Takara Battle mode."
Last edited by Stompy; 18th August 2009 at 12:15 AM.
 Rank 8 - Multi-Section Mod
That's so cute - he has a Beast Wars Neo-style flower mode.
Well puzzled-out, Stompy!
 Rank 8 - Deluxe Member
Can't wait to get back to my Mixmaster and try that conversion now! It actually doesn't look too bad in the end. I was certain those pegs on the back wheels that clip into the underside of the cab had to be usable in the correct transformation.
 Rank 8 - Deluxe Member
BURN for the Royalty!
Rank 8 - Multi-Section Mod
Blenderbutt!
 Posting Permissions

 Reply With Quote