Results 1 to 5 of 5

Thread: Broke my Henkei Cyclonus. Anyone got tips?

  1. #1
    Join Date
    29th Dec 2007
    Location
    Dunedin, New Zealand
    Posts
    3,412

    Default Broke my Henkei Cyclonus. Anyone got tips?

    Hers be a story -- while walking towards the shower tonight I stopped and looked at the mess that is my Classics/Universe 2.0/Henkei shelf. I picked up Henkei Cyclonus and proceeded to transform him. On the way back to robot mode, I found myself with an arm that was no longer attached to the robot mode.

    I spent a few minutes trying to re-attach but trying to force the the little clip over the pin was proving to be a bit more difficult than I thought (or could be bothered with) and decided that before I busted out the tools and made things worse I would stop and ask for guidance.

    Below are two photos I have stolen from http://www.moonbasetom.com
    They show the offending area circled


    So, guide away.
    Or laugh and make fun of for breaking a toy.

    And the moral of the story is - leave transforming toys till day time when you have lots of time.
    Or transform things more regulary than once a year.

  2. #2
    Join Date
    29th Dec 2007
    Location
    NSW
    Posts
    14,762

    Default

    Have I successfully replicated the issue with your Cyclonus?


    If so, let me know and I'll talk you into fixing it but if the problem is just 'dislocation' then it's easy to push it in place and your don't really need any tools.

  3. #3
    Join Date
    29th Dec 2007
    Location
    Dunedin, New Zealand
    Posts
    3,412

    Default

    Rather than try to explain it, I took a picture. (Except I still haven't figured out macro mode on the camera yet)


  4. #4
    Join Date
    2nd Jan 2008
    Location
    Quakers Hill
    Posts
    11,185

    Default

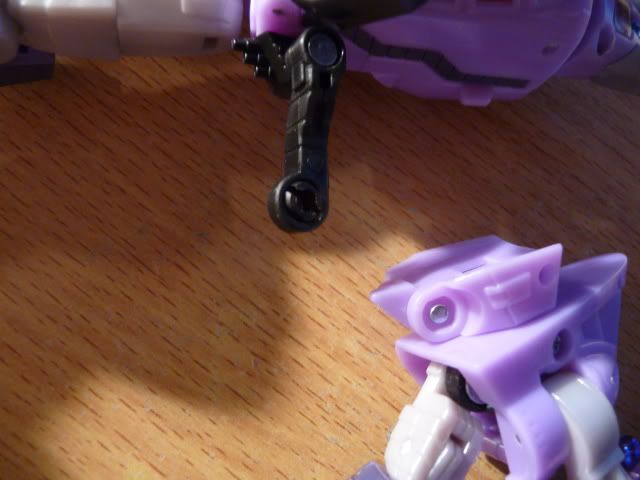
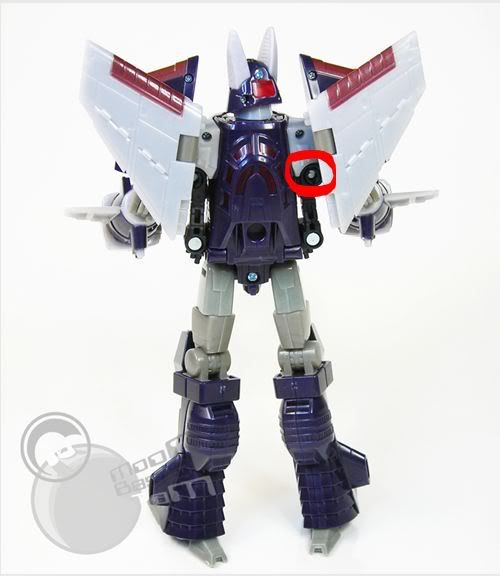
    Well that pic says it all. just need to push out that inner round thing and attach it back to the pin then you can attempt to clip the arm to the strut it belongs to. Clearly the tightening round plastic which should be around the pin went with the strut it's attached to instead of getting left behind with the rest of the arm unit.
    Wanted AM partner Vanguard, Myclones Dirge, G1 Victory Leo, e-hobby Dark scream ( the black version), e-hobby Magnificus
    Parts- AM partner Basher-side guns, G1 Actionmaster Elite Windmill's blades[I][B]

  5. #5
    Join Date
    29th Dec 2007
    Location
    NSW
    Posts
    14,762

    Default

    Yep, that's a bit of a tough one given the size of the piece but thankfully nothing seems broken.

    This is what you do:

    1. Squeeze the 'peg' out of the swivel as shown here:


    2. Once out, you will notice that the bottom of the peg matches the socket on the arm. You need to align the shape of the peg and the socket and try to push the peg in as hard as you can until the pin head pops in.

    3. If this proves too difficult and the pin refuses to go in, take the black peg and 'warp' the bottom of it a bit until the pin head gape opens a little more with the tip of a pencil or pen (pass it through the hole a bit, enough to enlarge it but not too far or it'll break). Now try to push the peg into the pin again, the gape on the bottom of the peg should be large enough to squeeze the pinhead in but still narrow enough to stay in place.

    4. If it doesn't want to stay in place once the pinhead is inside it, add a tiny drop of super glue and wait til it dries solid, then push the arm socket into the black swivel on the body.

    Let me know if you have any questions.

Posting Permissions

  • You may not post new threads
  • You may not post replies
  • You may not post attachments
  • You may not edit your posts
  •