-
21st December 2013, 08:39 PM
#1
 Plastic Modelling - Tumbler (Batman) WIP
Since I finished the massive Metroplex custom, the next project I wanted to tackle was the Moebius Models 1:25 scale Tumbler from Chris Nolan's Batman trilogy. Owing to illness, I've been at home the last week and able to get some painting done.
Some WIP shots:
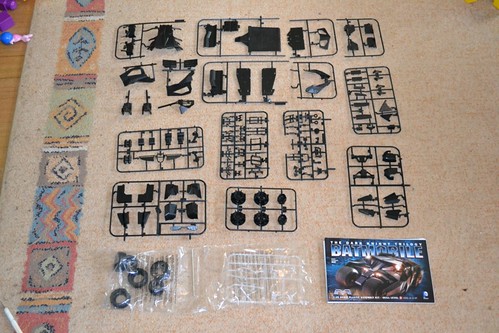
DSC_0267 by M-bot2011
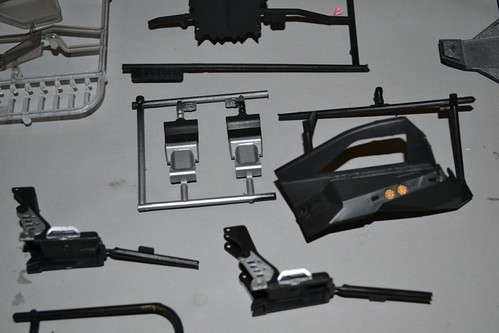
Everything in the kit. It's all a nondescript black except for the wheels (rubber), a metal rod rear axle, and the clear windows.
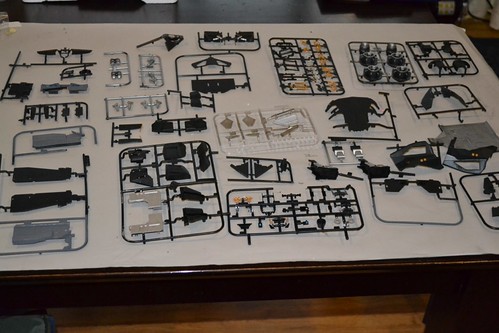
DSC_0303 by M-bot2011
All the pieces again, painted. Most of the body pieces airbrushed (I love my airbrush!! ) in flat black, and some of the larger silver pieces were airbrushed with Alclad II lacquers, but most of the rest was hand painted, including lots of little detailing (such as the actuators on the body pieces) in gloss black to distinguish them.
Some more closer shots:
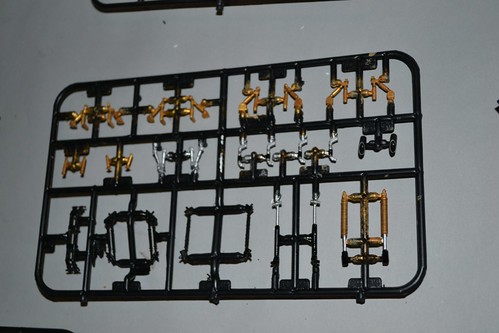
DSC_0301 by M-bot2011
Some of the pieces will need touch ups when removed from the sprues, of course, but it was much easier to paint the bulk of them still attached.
The gold pieces were base coated in a flat flesh colour, then 2 shades of gold to build up the colour.
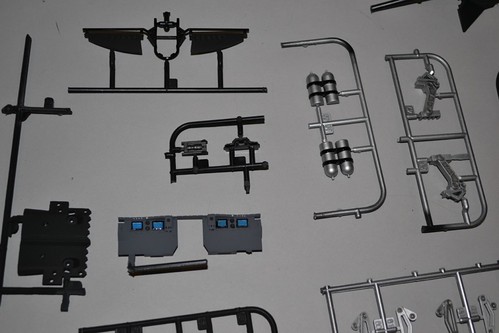
DSC_0298 by M-bot2011
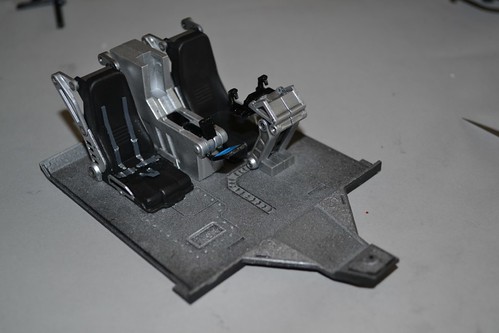
Some of the monitor pieces (painted blue) were a pain - took a couple of attempts and revisions to get them right. Still not entirely happy with them, but they're so damn small (only a couple of millimetres across) it's hard to get the lines straight.
I also did some washes, such as over the control panel pieces on the right.
DSC_0299 by M-bot2011
DSC_0295 by M-bot2011
Detailing work. I really hope these will be reasonably visible in the final product!
DSC_0296 by M-bot2011
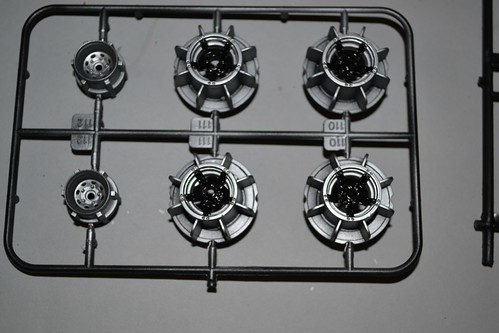
The wheel rims were done with the Alclad II paints (a high gloss black base coat with an Aluminium top coat), which came out ridiculously smooth. Really pleased with how they came out. Detailing in gloss black was done by hand.

DSC_0302 by M-bot2011
The windows were a clear, untainted plastic, but the instructions called for "clear black". I airbrushed them with Tamiya Smoke (which is transparent), and hoped for the best. Thought they came out really good, a nice and even tint.
Next is construction, I'll post up more pics as I go.
-
22nd December 2013, 09:40 PM
#2
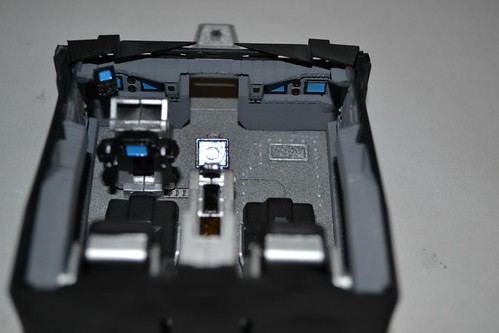
Assembly:
The cab is done. A few paint touch ups here and there.
DSC_0304 by M-bot2011
DSC_0305 by M-bot2011
And with the walls up:

DSC_0309 by M-bot2011
DSC_0307 by M-bot2011
You notice how there are only seat belts on the passenger side? Wonder why Batman doesn't need a seatbelt? It's because...http://www.youtube.com/watch?v=iaM_tYWBdyU 
-
22nd December 2013, 10:05 PM
#3
that looking great man..... totally looking forward to the rest of the build
-
27th December 2013, 08:01 PM
#4
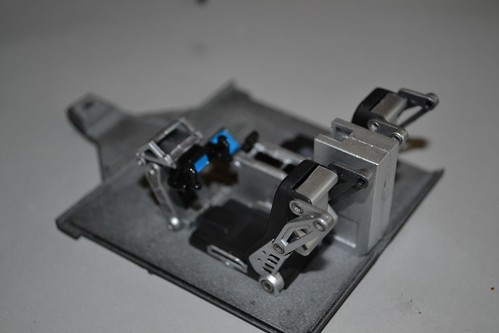
An update on the build. The gold looks a lot more orange in the photos than it does in hand. Progressing nicely.
DSC_0455 by M-bot2011
DSC_0456 by M-bot2011
DSC_0457 by M-bot2011
-
27th December 2013, 09:44 PM
#5
-
28th December 2013, 01:46 PM
#6
Hey, that's looking great! Much faster than my BSG build.  The detail colours add a nice bit of interest and texture to what would otherwise be a pretty bland colour scheme. Planning any weathering once it's all assembled? From the movies I never got the feeling that Batman would be too worried about a few scratches or some dirt.
How do you find painting the parts on the sprues? I've seen it suggested but I find that clipping the parts off and cleaning them up means there's usually and annoying amount of touch up work to do, especially for complex paint jobs or if there are seams that need filling. 
-
28th December 2013, 03:04 PM
#7
I didn't mind painting on the sprues too much at all. For the most part,
where the piece attaches to the sprue is not particularly visible, and if it does stick out, it's easy enough to touch up after it's attached.
I keep a fine brush and all the colours I need next to me as I work and touch up as I go.
I'm going for a clean look rather than weathered - to my mind, it's much harder to cover up mistakes when going clean, and I wanted the challenge. Also, after I airbrushed the main pieces of the body, I thought they looked so good, I wanted to keep them like that. If I make any very big blues during the build I'll likely change my mind...
Last edited by M-bot; 28th December 2013 at 06:13 PM.
-
28th December 2013, 04:11 PM
#8
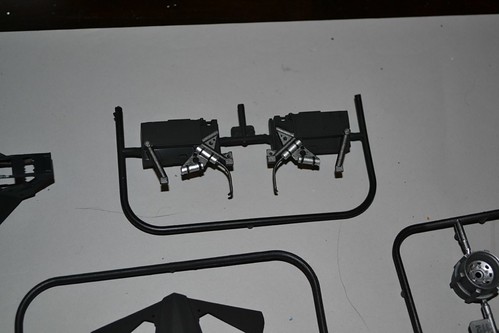
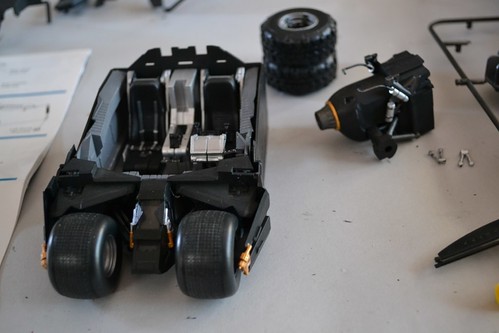
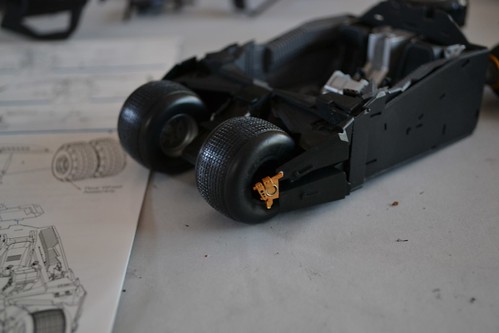
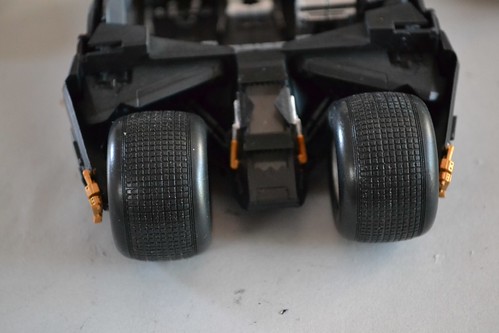
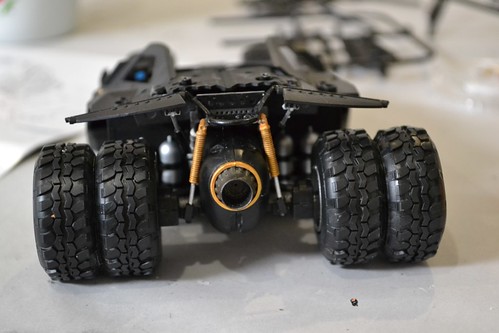
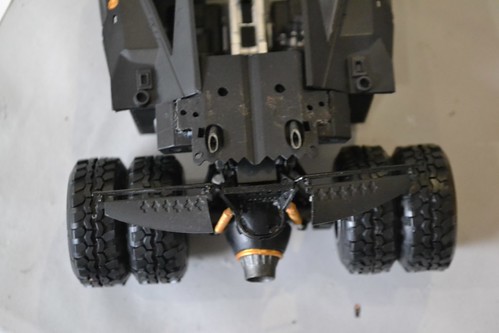
More of the build, including the rear axle and wheels. You can see some glue smudges on the top, so they will need to be cleaned up once dry.
Some of the struts and hydraulics in the rear section are majorly fiddly and the connection points are not always clear on the instructions.
DSC_0459 by M-bot2011
DSC_0460 by M-bot2011

DSC_0461 by M-bot2011
Last edited by M-bot; 28th December 2013 at 06:14 PM.
-
29th December 2013, 12:51 AM
#9
That's looking great man! The detail you've added really makes it pop.
 Posting Permissions
- You may not post new threads
- You may not post replies
- You may not post attachments
- You may not edit your posts
-
Forum Rules


 Reply With Quote


