Dude that thing is gonna be heavy!


 Rank 8 - Deluxe Member
Dude that thing is gonna be heavy!
 Rank 8 - Deluxe Member
Rank 3 - Basic Member
Rank 8 - Deluxe Member
Rank 3 - Basic Member
HahahahaOriginally Posted by M-bot

 Rank 8 - Deluxe Member
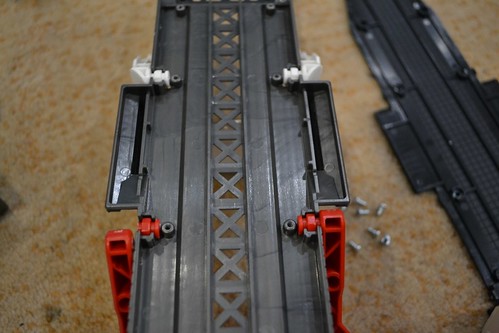
You are right! There is sort-of an explanation for it - since it's the Hasbro version, it only came with 1 red gun, which can fit over the figure's right shoulder in city mode as well as robot mode, so I didn't even realise there needed to be a spot for the second gun. Since then, I've made a deal with my illustrious buyer that will supply Metroplex with a second red gun, so I now need that hole I've plugged up. Out comes the drill...
I've been doing some painting - update to follow tonight if I can stay awake long enough.
Edit: nope, ran out of time and need to sleep. Tomorrow then!
Last edited by M-bot; 10th November 2013 at 10:18 PM.
Rank 6 - Dedicated Member
wow.. this is very interesting... thumbs up for showing us the pix!!!
Rank 8 - Deluxe Member
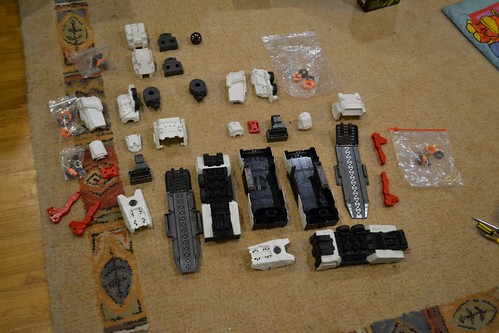
Big update:
From here on, I'll mostly be posting up more "teaser" type pictures, so we can have a cool reveal at the end of the custom, due now in just a few weeks. In this week's update, there is a bit of process pictures with regards to Scamper, which you'll see at the bottom of the post.
I've painted almost all the red parts, and about half the white pieces. The biggest thing to paint is the lower legs: they need a lot of work. This week will see everything painted (the rest of the white, and the black pieces), then the detailing work commences.
More pics of masking, priming, painting and panel lining:
DSC_0187 by M-bot2011
DSC_0180 by M-bot2011
DSC_0181 by M-bot2011
DSC_0177 by M-bot2011
Some of the body pieces are going to be silver. I had to spray the silver first, then it will be masked before the 'white' base goes on.
DSC_0183 by M-bot2011
The 'windows' need a silver base before a colour spray - you'll see below the effect I'm going for.
DSC_0185 by M-bot2011
The red pieces are painted with a gloss red with a tiny bit of black mixed in, so they've come up a vivid blood red. Really liking the colour, it pops nicely.
DSC_0176 by M-bot2011
DSC_0179 by M-bot2011
Panel lined on the right of the photo, not panel lined on the left. Unfortunately slightly blurry (the camera focussed on the helmet).
DSC_0191 by M-bot2011
I had to stick the guns back together with blutak and respray some of the joining areas, as they were very slightly inconsistent when painted separately. It wasn't noticeable when they were apart, but put together it was there. Now, they blend together perfectly.
DSC_0186 by M-bot2011
Some of the white paired pieces. Not too exciting on their own. The colour I've painted them is a gloss white with a hint of silver. You can't see it from the photos, but the colour is just beautiful.
DSC_0189 by M-bot2011
Here's a comparison shot with one of the unpainted pieces (on the left) to give a bit of contrast.
DSC_0192 by M-bot2011
Now, onto Scamper's windshield, which I wanted red rather than blue. I originally thought I could hand paint it, and this was the disappointing result:
DSC_0173 by M-bot2011
So I stripped it back...
DSC_0174 by M-bot2011
...spray base coated in silver, which I then sprayed (not hand painted!) with a transparent red...
DSC_0178 by M-bot2011
...and then finished the top, inside and in-between pieces with a combo of dry-brushed matte black and a gloss black. It turned out like this:
DSC_0194 by M-bot2011
Much better, I'm sure you'll agree.
Thanks again for the positive feedback and comments. I'm open to more comments, if you have them!
Rank 8 - Deluxe Member
I'm really enjoying watching this come together.
You're ideas of mixing the black with the red and prepainting Scampers windows with Silver and mixing the silver with the white have really paid off.
How did you do the panel lining on the "ear" pieces? was it a black wash or something like a gundam marker?
 Rank 8 - Deluxe Member
Yeah me too...looking good Mbot...
Rank 8 - Deluxe Member
I used a black wash, watered down further, with about 2 layers. I prefer to use a liquid wash as it tends to find the grooves all by itself and if you stuff anything up, a quick wipe and you can do it over.
Rank 8 - Deluxe Member
 Posting Permissions


 Reply With Quote
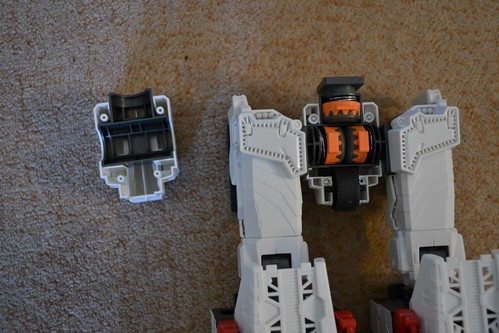
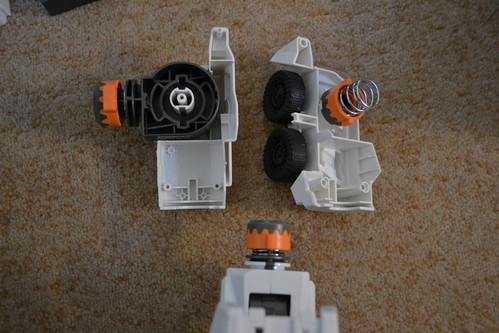
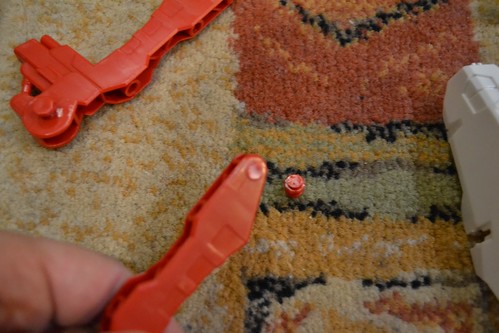
 I pulled the red piece the wrong way and >snap<. I'll glue it back together, if that doesn't work, I'll drill through the middle and put a pin in it.