Oh man, I would've found that to be utterly annoying and frustrating, glad to hear you've found an effective repair method dude.


 Rank 8 - Deluxe Member
Oh man, I would've found that to be utterly annoying and frustrating, glad to hear you've found an effective repair method dude.
My Transformers Collection (24/01/12) - My Soundwave Collection (04/02/13) - My Wants List (20/08/2013)
Follow me on Twitter: @Hursticon & Instagram: @Hursticon
 Rank 6 - Dedicated Member
yikes, I just got caught up to date with the progress, I wasn't aware of the botched repair job on the other foot (I'm pretty terrified of doing any fixes myself). Hopefully it'll still function (but not like Megatron still functioned in the original movie).
 Rank 8 - Deluxe Member
It's ok, the hardest part was undoing the fix and then adapting the broken off leg to fit the body as it seems to have belonged to another Sky Lynx. No harm done and I enjoy the challenge and it would give me even more satisfaction when I get him walking and rolling again.Originally Posted by Blink90210

Last edited by kup; 12th May 2011 at 07:40 PM.
Rank 8 - Deluxe Member
Update:
Sorry that it's taking me a while to update. I have been very busy but I have made progress and took pics of my progress which I will upload in a write up in the next day or two.
So far I have been able to make Sky Lynx walk properly again, the biggest challenge was actually synchronizing the four legs into a forward walking movement but I made it. The next thing is just to fix the tracks on the wheels which should be pretty easy.
I will have pics soon, I guess I will have to take a video of Sky Lynx walking and rolling when he is ready too.
Rank 8 - Deluxe Member
Excellent news dude, I look forward to seeing what you've been able to achieve with this old guy.
My Transformers Collection (24/01/12) - My Soundwave Collection (04/02/13) - My Wants List (20/08/2013)
Follow me on Twitter: @Hursticon & Instagram: @Hursticon
Rank 8 - Deluxe Member
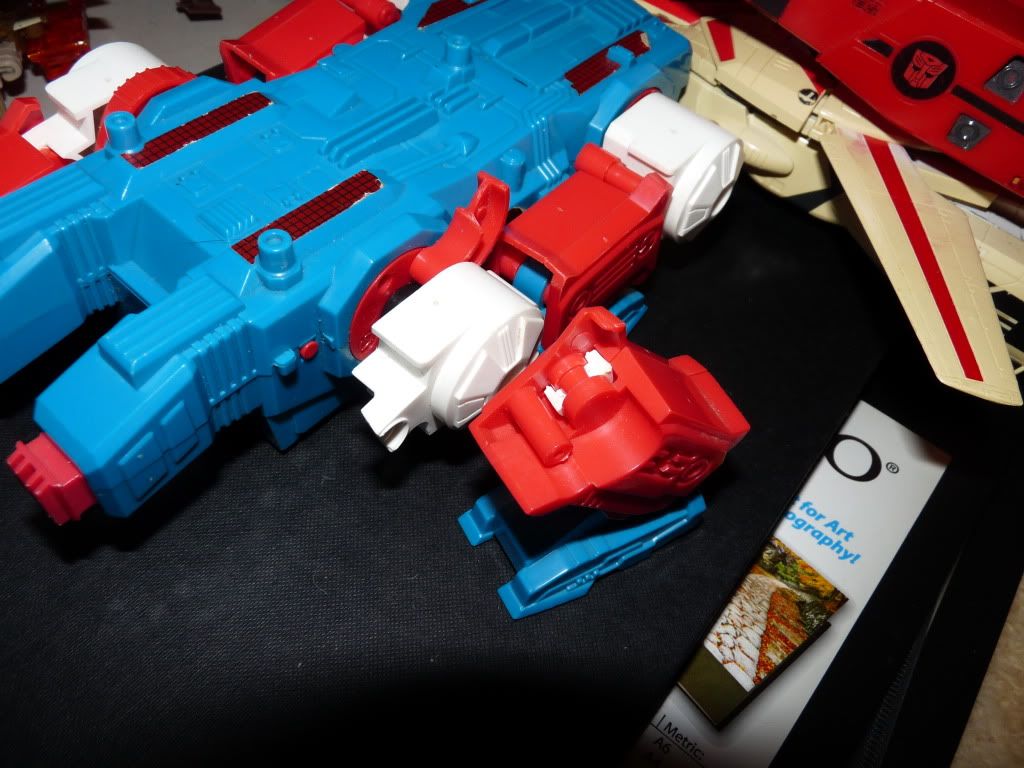
Fixing Sky Lynx's broken Leg
As some of you may have realized, vintage well played Sky Lynx toys have a tendency to break parts of their legs or completely break off a leg. It is not uncommon to see the 'J' red piece which is used for knee movement broken which would result in Sky Lynx not walking properly or not at all.
Fixing the broken 'J' piece:
As mentioned, this piece is critical for knee movement and Sky Lynx will not walk if even one of these is broken. There is one 'J' piece for every leg.
The first step to fixing the broken 'J' piece is to take an impression of one of the unbroken ones from another leg. They are all functionally the same and interchangeable with any leg.
Then place the broken piece on top of the 'whole' piece impression so that you can clearly see the part that is missing.
Then using a sharp hobby knife, cut the 'missing' piece out of the putty. The 'broken' edge of the putty piece must fit the plastic one so cut carefully while keeping that in mind. It doesn't have to be perfect as you can always adjust the putty by shaping it a bit but it helps a lot if you maintain the fitting edge shape when you cut it out.
After you cut the piece out, puncture a hole of similar size to that of an unbroken 'J' Piece and shape it a bit so that it's sufficiently wide and round. Make sure that the putty piece fits and 'completes' the broken red piece as close as possible. Then put it in the oven for about 15-20 minutes until the piece hardens.
Important: Do not place any plastic parts in the oven, only the Putty piece.
Note: It is advised that you compare the piece you are 'completing' with an unbroken piece often during this whole process. This way, you can make sure that your reconstructed piece is the same shape.
After it comes out of the oven, you may need to make some further adjustments with the hobby knife and then super glue the pieces together to make a complete 'J' piece:
It doesn't look perfect but we are going for functionality rather than aesthetics. Regardless, most of the 'putty' part will be hidden behind the leg when assembled so it won't impact the look of the leg at all. You can always paint it red once you are done if you feel inclined to do so.
This fixes our broken 'J' piece. Now we move on to fixing the rest of the leg which is a much simpler and straight forward process.
Broken Leg
As you can see bellow, all that I did was replace the broken peg with a piece of plastic of similar shape by cutting an appropriate size and gluing it on with super glue.
To fix the broken loop on the white piece, I just super glued the pieces together while being careful to maintain the hole's round shape and size. After drying, make sure the red piece's peg fits within the repaired white loop part loosely.
Note: This joint has to be very loose for the piece to function as that is how it's supposed to be. The pieces should should move freely with no friction.
Here is what an unbroken piece looks like on the red piece:
Now as a final test before assembly, be sure that the 'J' piece fits the custom peg very loosely. Make sure that it moves freely with no friction or it won't work.
Allow the pieces to dry for one night and then assemble them. Once this is done, it's time for a test run.
Important Note: Make sure the legs are positioned correctly during assembly so that they are all synchronized into a forth walking position while in movement. If they are incorrectly aligned, the Lynx will either walk backwards, drag it's legs or stay in the same place as it tries to walk. You will need some trial an error before getting this right.
Here are some pics assembled, note the leg positions on both sides:
Here is the video of Lynx walking:
http://www.youtube.com/watch?v=zTwiZ...=youtube_gdata
Next up will be the wheel tracks.
Last edited by kup; 26th May 2011 at 09:22 AM.
Rank 6 - Dedicated Member
This is awesome! So glad you've been able to work your magic on the guy.
 Posting Permissions


 Reply With Quote