-
4th August 2012, 11:48 PM
#1
 Optimus Prime (2nd colouring attempt)
I decided to have another go at colouring my lineart.
Still don't know how to do metallic and shiny effects, hope to learn that in the near future. At least my flats aren't as dodgy looking as before.
Any tips on digital colouring in general most welcome. Thanks. 
http://wildspark.deviantart.com/art/...rime-268584313
Last edited by Sam; 5th August 2012 at 07:10 PM.
Reason: fixed typo
-
5th August 2012, 01:26 AM
#2
Very nice initial efforts dude, remember; Practise makes perfect.
-
5th August 2012, 12:53 PM
#3
Thats a great start man keep up the good work! What program(s) are you using? Are you using a mouse or a tablet?
As for advice: Best thing to do is just keep experimenting and looking at tuts for coloring. When I started doing my anime girl (Still not finished yet coz im lazy) I watched and read around 40 tuts on skin colouring and adapted about 3 into 1 as it was what felt more comfortable for me.
-
5th August 2012, 07:14 PM
#4
Thanks for the feedback guys!
@deadonarrival - I used regular pencil (HB) on A4 paper (because I don't have an A3 scanner). Didn't get a chance to use my scanner so took a photo of it.
Strengthened the lineart and added flat colours in GIMP.
I have been looking at some tutorials, many of them explain the first process of going over the drawing with colours as "block it out" or "first pass". I don't know what the heck that means.
I am guessing it means to go over the whole drawing with the basic colours, but it does not explain the best technique or method for doing so...
-
5th August 2012, 08:53 PM
#5
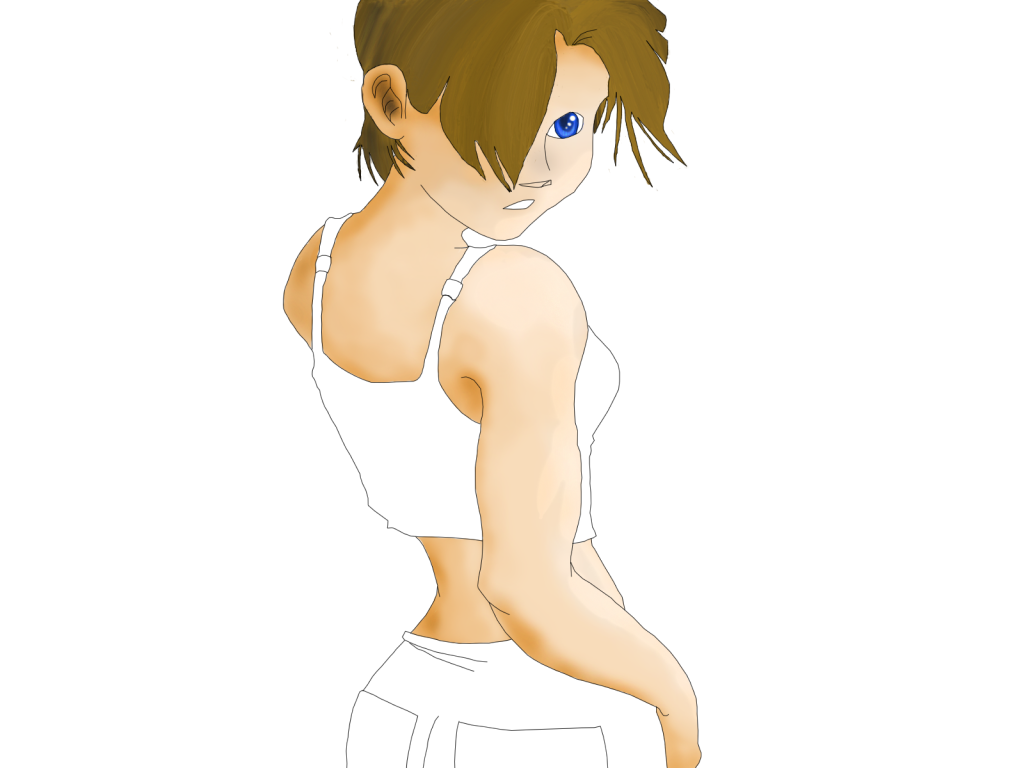
What I do is i basically get the 3 shades of color i want and then smudge the heck out of them to make a skin tone. So its basically: Normal color, then the dark color for shadow and a lighter color for where the light is hitting. I then use the dodge and burn tool for highlighting and shadowing the areas til im happy (this is all in photoshop dont know the gimp equivalent). I've posted my wip for you to see what I mean, and I dont know if this will help with the robot coloring but it was easiest for me and as I said there is no right or wrong way. Oh and please ignore the hair I am currently working out that.
-
5th August 2012, 10:52 PM
#6
I read about those tools, and GIMP has them all as well. I think they could work, so I might try that instead.
For armour I am also looking to add something of a metallic shine to it.
Speaking of Photoshop, what version are you using? I saw that even when buying online, CS6 is like 600 bucks...
-
26th August 2012, 07:34 AM
#7
Very nice work! A simple method for shadows on a figure is to create a new layer above the colours, then get a black brush and just paint in where you want the shadows to be. Then just drop the opacity of this layer way down till you get the effect you want. (This will make the blacks see-through and much less harsh).
You can use the same technique with a white brush to get highlights. It won't be a completely professional finish but it's something worth having a go with (because it's easy and fast!)
Also, I highly recommend getting a tablet, if you can. It's SO much easier than a mouse for doing work like this.
 Posting Permissions
- You may not post new threads
- You may not post replies
- You may not post attachments
- You may not edit your posts
-
Forum Rules


 Reply With Quote